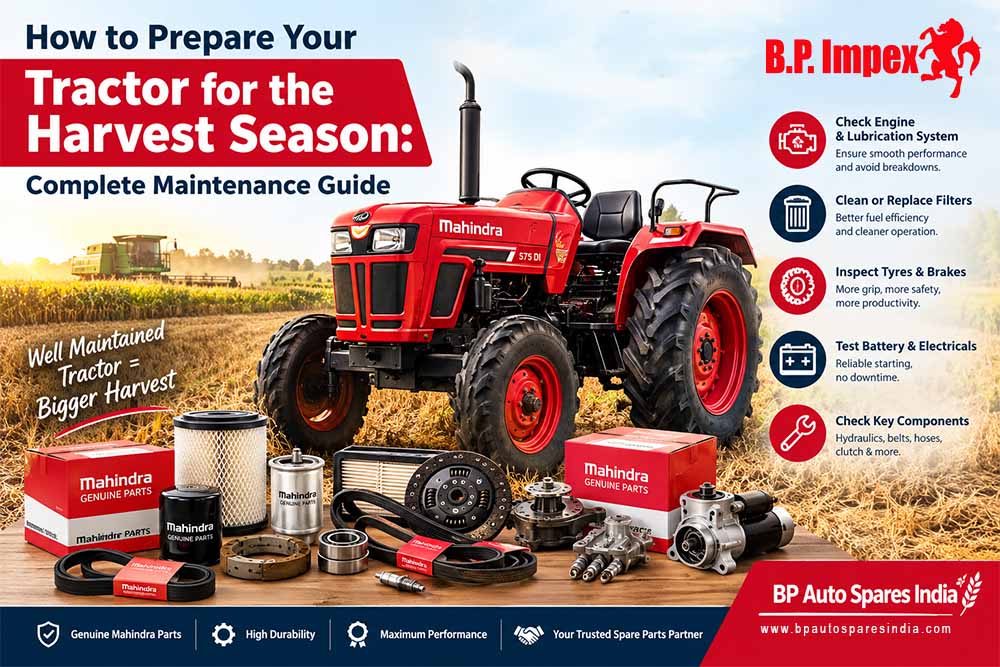
The harvest season is the most critical period of the agricultural year. After months of soil preparation, planting, and crop care, your entire yield depends on executing a timely, uninterrupted harvest. At the heart of this operation is your tractor. A mechanical breakdown during peak harvest can lead to delayed crop gathering, exposure to unfavorable weather, reduced grain quality, and heavy financial losses.
Preparing your tractor before stepping into the field ensures peak operational efficiency, maximum fuel economy, and operational safety. This comprehensive guide walks you through every step required to inspect, service, and optimize your machinery for the grueling demands of the harvest season.
1. Engine & Fluid System Maintenance
Your tractor’s engine operates under heavy, continuous load during harvest. Ensuring pristine fluid levels and functional filtration systems prevents costly overheating and internal wear.
Engine Oil and Filter Replacement
Engine oil degrades over time due to heat, friction, and soot accumulation. Running old oil during heavy field operations increases internal friction and engine wear.
- Drain and Refill: Change the engine oil according to the manufacturer’s hourly interval recommendations. Always drain oil while the engine is warm to remove suspended contaminants.
- Oil Filter Replacement: Always install a fresh oil filter during an oil change to ensure smooth oil circulation and optimal pressure.
Fuel System & Filtration
Dirty fuel can cause engine misfires, lost horsepower, or complete pump failure.
- Drain Water Separators: Drain moisture from the fuel-water separator daily during prep week. Water in fuel injection systems causes rapid wear and corrosion.
- Replace Fuel Filters: Swap out primary and secondary fuel filters to ensure smooth fuel flow under full engine loads.
Coolant and Radiator Prep
Overheating is a leading cause of downtime during harvest.
- Flush and Refill: Check coolant concentration using a hydrometer. If the coolant is discolored or old, flush the system completely.
- Clean the Radiator Fins: Blowing out chaff, dust, and debris from the radiator grill with compressed air improves airflow and prevents thermal overload.
2. Air Intake System Care
Harvest fields are notoriously dusty environment environments. Dust entering the combustion chamber can ruin cylinder walls and rings in a matter of hours.
Inspection and Cleaning
- Outer Element: Remove the primary air filter element and tap it gently or clean it using dry compressed air from the inside out (keep pressure under 30 PSI to avoid tearing the media).
- Inner Safety Element: Never clean the inner safety element; replace it if it appears dirty.
- Check Intake Hoses: Inspect rubber intake boots and clamps for cracks or looseness. Any leak downstream of the filter allows unfiltered air directly into the engine.
3. Transmission, Hydraulics, and Final Drives
The hydraulic and transmission systems handle heavy torque transfers and drive the implements used during harvest, such as grain wagons, balers, and loaders.
┌─────────────────────────┐
│ Pre-Harvest Hydraulics │
└────────────┬────────────┘
│
┌───────────────────────┴───────────────────────┐
▼ ▼
┌──────────────────┐ ┌──────────────────┐
│ Fluid & Filters │ │ Hoses & Couplers │
├──────────────────┤ ├──────────────────┤
│• Check dipstick │ │• Inspect leakage │
│• Change filters │ │• Clean quick-caps│
└──────────────────┘ └──────────────────┘
- Fluid Level Verification: Park the tractor on level ground, lower all hydraulic arms, and verify fluid levels using the sight glass or dipstick.
- Hydraulic Filter Replacement: High-pressure hydraulic filters collect microscopic metal shavings. Replace filters to prevent valve sticking and pump cavitation.
- Hose and Hose Fitting Checks: Check high-pressure hoses for swelling, abrasions, or oil leaks. Ensure quick-disconnect couplers are clean and latching securely.
4. Electrical System and Battery Health
Modern tractors rely heavily on electronics for instrument displays, lighting, GPS guidance, and electronic hitch controls.
- Battery Testing: Clean corrosion off battery terminals using a wire brush and a water-baking soda solution. Ensure cable clamps are tight. Measure the static voltage (should be ~12.6V) and check cranking voltage drop.
- Lighting Check: Nighttime harvesting is common. Verify that all headlights, work lights, hazard flashers, and tail lamps function properly. Replace dim halogen bulbs with high-output LEDs if necessary.
- Alternator Tension: Check the alternator drive belt for tension and cracking. A slipping belt causes battery discharge and cooling fan underperformance.
5. Chassis, Steering, and Brake Inspections
A fully loaded grain trailer pushes tractor stability and stopping power to its limits.
Steering and Front Axle
- Grease Points: Apply chassis grease to kingpins, tie-rod ends, front axle pivot points, and steering cylinders until fresh grease purges from the seals.
- Toe-In Alignment: Inspect front wheel alignment to prevent uneven tire wear and erratic steering at transport speeds.
Brake Adjustments
- Pedal Equalization: Ensure both left and right brake pedals are latched together for transport operations and that braking force is equalized across both wheels.
- Fluid/Mechanical Linkage: Check hydraulic brake fluid reservoirs or adjust mechanical linkages to ensure firm pedal response without excessive free play.
6. Tires and Ballast Management
Proper traction minimizes soil compaction, reduces fuel burn, and maximizes horsepower transmission to the ground.
| Check Area | Inspection Goal | Action Needed |
| Inflation Pressure | Correct PSI based on field vs. road loading | Adjust air pressure according to tire load charts |
| Tread Condition | Minimal lug wear, no deep sidewall cuts | Replace damaged tires before heavy load usage |
| Wheel Bolts | Torque verification | Tighten wheel lug nuts to manufacturer specs |
| Ballasting | Correct front/rear weight split | Add or remove cast weights or liquid ballast as needed |
7. Crucial Role of Genuine Replacement Components
During high-intensity field operations, replacing worn components with high-quality parts is essential for reliability. Using low-grade or non-compatible parts can cause premature failure, void warranties, and lead to extended downtime.
When replacing worn belts, filters, friction plates, or hydraulic seals, always opt for genuine factory-certified parts. For owners operating Mahindra machinery, sourcing reliable Mahindra Tractor Spare Parts ensures proper fitment, factory-grade durability, and long-term mechanical protection. Keeping an inventory of critical wear items—such as fan belts, fuses, secondary filters, and shear bolts—stored directly in your toolbox can save hours of field delay.
If you need to stock up on genuine components, filters, and maintenance kits before the season begins, you can Buy Tractor Spare Parts Here to get fast delivery right to your workshop.
8. Pre-Season Field Testing Checklist
Before driving into your primary crop fields, execute a comprehensive 15-minute field run to test all systems under actual working conditions.
1.Static Warm-Up:Duration: 5 minutes.
Start the engine and let it idle. Monitor oil pressure lights, battery voltage indicators, and temperature gauges. Listen for unusual engine knocking or exhaust leaks.
2.Hydraulic Cycle Test:Duration: 3 minutes.
Raise and lower the three-point hitch completely. Actuate all remote valve levers to check for smooth operation, full stroke movement, and instantaneous pressure response.
3.Drive & Steering Run:Duration: 5 minutes.
Drive the tractor through all gears, including reverse. Check differential lock engagement, 4WD engagement, and observe steering responsiveness without slippage or grinding noises.
4.PTO Engagement Test:Duration: 2 minutes.
Engage the Power Take-Off (PTO) shaft at low RPM and bring it gradually to standard operating speed (540 / 1000 RPM). Listen for bearing whine or excessive vibration.
9. Operator Safety and Cabin Comfort
Operator fatigue directly impacts safety and harvesting accuracy. Preparing the cabin environment is as vital as servicing the engine.
- Air Conditioning & Cabin Filters: Clean or replace fresh-air and recirculation cabin filters to keep dust out and maintain efficient air conditioning during hot afternoon hours.
- Operator Seat Adjustment: Verify that seat suspension, height, and weight controls operate correctly to cushion the operator over rough terrain.
- Safety Equipment Setup: Store a fully charged ABC dry-chemical fire extinguisher inside or near the cabin door. Keep a well-stocked first aid kit and an emergency reflective triangle on board.
- Clean Windows & Mirrors: Clean all cab glass thoroughly inside and out to eliminate glare during low-sun morning and evening operations.
Summary Routine Table
Refer to this concise pre-harvest preparation matrix to track your service progress:
| System | Key Actions | Essential Tools/Items Needed |
| Engine | Change oil, replace oil & fuel filters, flush coolant | Wrench set, oil drain pan, fresh coolant |
| Air Intake | Clean primary filter, inspect hoses and intake boots | Compressed air gun, screwdriver |
| Hydraulics | Top up hydraulic fluid, change filter, check hoses | Hydraulic oil, replacement filter element |
| Electrical | Clean battery terminals, test work lights & flashers | Wire brush, multimeter, spare LED bulbs |
| Chassis | Grease grease fittings, align steering, equalize brakes | Grease gun, lithium grease, wrench set |
| Tires | Check PSI, inspect lug depth, torque wheel bolts | Pressure gauge, torque wrench |
| Safety | Inspect fire extinguisher, clean cab glass, test seat | Glass cleaner, safety kit, fire extinguisher |
Taking the time to systematically inspect, service, and repair your tractor before harvest begins transforms unpredictable field challenges into a smooth, efficient, and profitable harvesting season. Proper preparation protects your investment, keeps operational costs manageable, and delivers peace of mind when every minute counts.






Leave a Reply